Honda Odyssey Service Manual: How to Troubleshoot using the ETM (TRO-1)
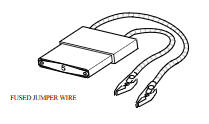
Five Step Troubleshooting 1. Turn on all of the components in the problem circuit to check the accuracy of the customer complaint. Note the symptoms. Do not begin disassembly or testing until you have narrowed down the problem area. 2. Look up the schematic for the problem circuit. Determine how the circuit should work by tracing the current paths from the power source through the circuit components to ground (certain circuits contain a “How the Circuit Works” section). Also, trace circuits that share wiring with the problem circuit. The names of circuits that share the same fuse, ground, or switch, and so on, are referred to in each circuit schematic. Try to operate any shared circuits that you did not check in step 1. If the shared circuits work, the shared wiring is OK, and the cause must be in the wiring used only by the problem circuit. If several circuits fail at the same time, the fuse or ground is a likely cause. Based on the symptoms and your understanding of the circuit's operation, identify one or more possible causes 3. Make circuit tests to check the diagnosis that you made in step 2. Keep in mind that a logical, simple procedure is the key to efficient troubleshooting. Test for the most likely cause of failure first. Try to make tests at points that are easily accessible. 4. Once the specific problem is identified, make the repair. Be sure to use proper tools and safe procedures. 5. Turn on all components in the repaired circuit in all modes to make sure that you have fixed the entire problem. If the problem was a blown fuse, be sure to test all of the circuits on that fuse. Make sure that no new problems turn up and that the original problem does not recur. Test Equipment CAUTION: Most circuits include solid-state devices. Test the voltages in these circuits only with a 10-megaohm or higher impedance digital multimeter. Never use a test light or analog meter on circuits that contain solid-state devices. Damage to the devices may result. Test Light and DVOM On circuits without solid-state devices, use a test light to check for voltage. A test light is made up of a 12 volt bulb with a pair of leads attached. After grounding one lead, touch the other lead to various points along the circuit where voltage should be present. The bulb will glow if there is voltage at the point being tested. If you need to know how much voltage is present, use a digital volt/ohmmeter (DVOM). If you need to know exactly how much resistance there is between two points, use a digital volt/ohmmeter (DVOM). In the “OHMS” range, the DVOM will measure resistance between two points along a circuit. Low resistance means good continuity. Diodes and solid-state devices in a circuit can make a DVOM give a false reading. To check a reading, reverse the leads, and take a second reading. If the readings differ, the component is affecting the measurement. Jumper Wire Use a jumper wire to bypass an open circuit. A jumper wire is made up of an in-line fuse holder connected to a set of test leads. It should have a five ampere fuse. Never connect a jumper wire across a short circuit. The direct battery short will blow the fuse.
To order test equipment, contact your local tool supplier. For a list of suppliers and tool numbers, refer to Honda Required Special Tools and Equipment Service Bulletin. |
See More:
Honda Odyssey Owners Manual > Bluetooth® HandsFreeLink®: Using HFL
HFL Buttons (Pick-up) button: Press to go directly to the Phone screen or to answer an incoming call. (Hang-up) button: Press to end a call. (Talk) button: Press to call a number with a stored voice tag. (Back) button: Press to cancel a command. PHONE button: Press to go directly to the Phone screen ...
Honda Odyssey Owners Manual
- Quick Reference Guide
- Safe Driving
- Instrument Panel
- Controls
- Features
- Driving
- Maintenance
- Handling the Unexpected
- Information


